

Create an Onsite Display Campaign
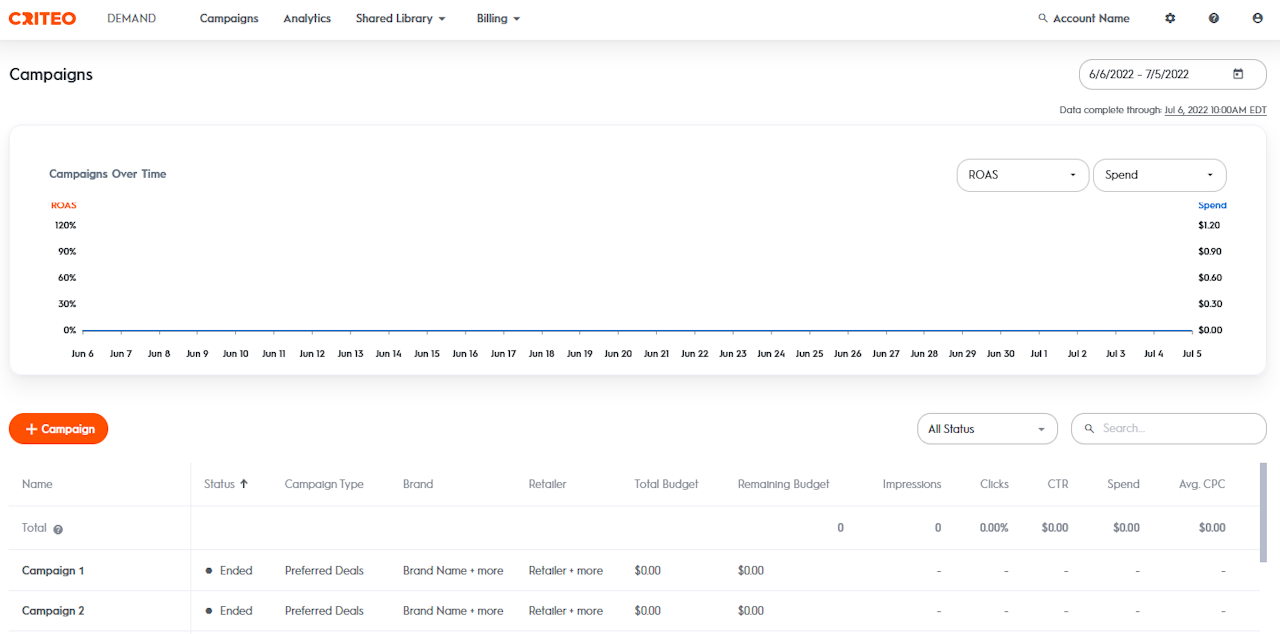
You can view, create, and manage campaigns from the Campaign Dashboard page when first opening the platform. All existing campaigns will appear in the graph and data table on this page.
To create a campaign, click on the +Campaign button in the center-left of the screen. Then select Onsite, Onsite Display, and Onsite Display Campaigns on the next page under Buy Type.
The campaign creation form should automatically appear. In this form, complete the following:
Campaign Name
Advanced Settings
Attribution Settings
Ad Preview Cookie
A/B Test
Frequency Capping

Campaign Settings
There are three campaign types to choose from for Onsite Display campaigns – Auction, Preferred Deals, and Sponsorship.
Campaign Subtype:
Auction:
An auction is a type of campaign where you bid in real time to win ad placements using a CPM (cost per thousand impressions) model. These campaigns are powered by machine learning to ensure ads are shown to the most relevant shoppers at the most impactful moments.
You compete in a first-price auction, where the highest bidder wins the impression and pays the exact amount they bid. Bids are placed dynamically, based on the value of each opportunity, helping retailers maximize ad space efficiency and enabling you to reach the right audience more effectively.
Auction campaigns also offer a flexible setup by allowing you to choose multiple page types and creative formats within a single line item. This reduces the need for separate line items and manual adjustments, streamlining campaign management. You can also set custom bids per page type, enabling smarter pricing based on performance potential. This setup supports more dynamic campaigns, with broader reach and greater efficiency.
Preferred Deals:
Campaigns that target a specific audience or set of users. Ads will only appear to those users when they visit a retailer site or app that aligns with your campaign's targeting. If the retailer approves, ads can appear on a page that contains ads for other brands or products. The pricing model for Preferred Deals is on a CPM (cost-per-impression) basis.
Sponsorship:
Campaigns that will take over a specific page of a retailer site or app for a set amount of time. Sponsorship appears to 100% of users who visit the specific page you selected for your Sponsorships, so there is no specific audience targeting. Sponsorship run for a specific amount of time on a retail page and are billed at a flat rate set by each retailer.
Campaign Name:
The campaign name you choose will be seen only by you in the Campaign and Analytics Section. It will not appear in your ads and will never be visible to shoppers or other accounts.
We recommend using a name that is recognizable for reporting
Example: Product Name_Retailer_Month_Year
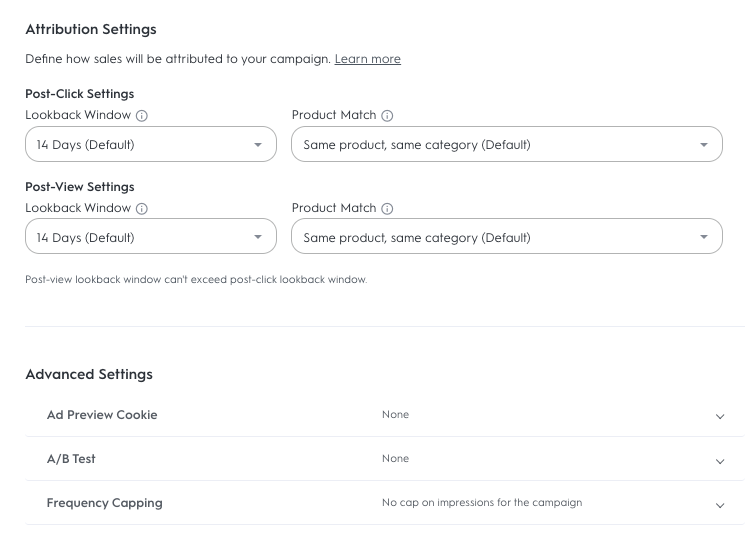
Attribution Settings
The conversion cycle can be drastically different between a shopper buying groceries and a shopper buying a TV. Your Return on Ad Spend (ROAS) measurement can also be different depending on your objectives (lower or upper funnel) and the ad formats that you are running.
Customize your attribution settings to fit your campaign's goal by selecting which Lookback Window to use and defining the Product Match for both Post-Click and Post-View conversions.
The Lookback Window is the eligible period between a sales transaction and an ad event. The Product Match is the relationship between the purchased product and the advertised one.
You can choose from the following options:
Post-Click Settings
Lookback Window:
7 Days
14 Days
30 Days
Product Match:
Same product
Same product, same category
Same product, same category, same brand
Post-View Settings
Lookback Window options:
No Post-View
1 Day
7 Days
14 Days
30 Days
Product Match options:
Same product
Same product, same category
Same product, same category, same brand
By default, the Commerce Display legacy platform Attribution Settings will be used unless you edit them:
Post-Click: 14 Days, Same Product + Same Category
Post-View: 14 Days, Same Product + Same Category
In the beginning, we recommend that you set up an attribution window that you’re used to leveraging in other platforms, in order to compare performance evenly. Then, as you turn on more campaigns, you can consider changing your model to see the impact of those changes.
You can change the attribution settings after creating your campaign and launching your line items.

Advanced Campaign Settings (Optional)
A/B Testing
For Onsite Display campaigns, you have the option to set up an A/B test to measure the campaign's performance between shoppers exposed to your campaign versus shoppers who have not been exposed to your campaign.
Frequency Capping
You can limit the number of impressions exposed to a shopper by setting a Frequency Cap.
To set a Frequency Cap:
Enter the maximum number of impressions to serve to each shopper. Valid entries are 1 to 20.
Select between the two supported intervals:
Day: 24 hours
Session: If a shopper is browsing a retailer site and is inactive after 30 minutes

